Thursday, February 24, 2011

Bonbonniere, Panettone

Chef Keith's Elegant Bonbonniere With Chocolate Rose

Today's class was more technical than usual: we made bonbonniere, a small fancy box filled with bonbon, or candy. Ours was way cool, made and filled with, you guessed it, chocolate!

Tampering Chocolate: The Many Faces Of Chef Keith 

For the box to set properly, the chocolate first had to be tampered well. Now that I've done it a couple of times without stuffing up, this step doesn't petrify me as much anymore.

 Creating Chocolate Rose Petals

Building The Chocolate Rose

Once the petal have set into place, luster is dusted on for a shimmery effect. I like this rose, with its Gothic Corpse Bride / Beetlejuice look and dark romantic feel, it's very sexy indeed! 

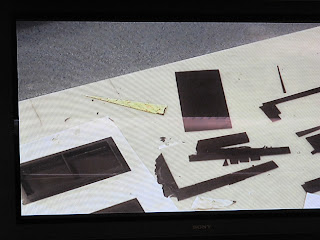
Layering Chocolate Onto Transfer Sheet, Cutting Into Shape

Constructing Chocolate Box 

With template as guide, cutting out the pieces and building the box took no time at all. It was gloves on the whole time to avoid leaving fingerprints on the glossy chocolate surfaces.

Macerated Fruits & Nuts For Panattone  

Candied fruits and almonds are mixed together with some alcohol to macerate overnight. The recipe called for 20ml of rum, so I rounded that up to 75ml.

My Overdressed Bonbonniere

My bonbonniere was très bonne! Sure the Hawaiian top may clash with the Victorian lace bottom, but hey, I was having a ball today, trying my hand at different decorating techniques. 

I used the entire transfer sheet for the top and neatened the edges with dark chocolate piping. Not wanting to distract from the cheery pattern, I finished with 2 long simple waves of chocolate ribbons. And rather than leave the sides plain, I piped a lace design that probably belongs more on a wedding cake. 

Chef Keith taught us how to make mitre, or 45 degree angle cuts, for the sides to join seamlessly at the ends, but I did it the other way around, with the dull side facing out. Doh. Not wanting to lose the shine, I piped white chocolate columns to neaten up the corners. Like I said, this was a class for trying out new things, which I did, and I'm happy with the result. Bonne, mon cherie!

Saturday, February 19, 2011

Moulded Chocolates, Caramelised Fruits & Marzipan, Milk Chocolate Fudge, Preserved Fruit Peel

Chef's Moulded Chocolate Treasures

We end this week's petit fours theme with, amongst other things, more chocolate! Unlike the truffles made in Basic with their kaleidoscope of booze flavored fillings (which I lurved) or chocolate croquembouche made in Intermediate with their very thick chocolate shells (which I did not enjoy biting through), these babies encased a simple and gorgeous honey ganache within a thin chocolate shell, though the process was anything but simple:

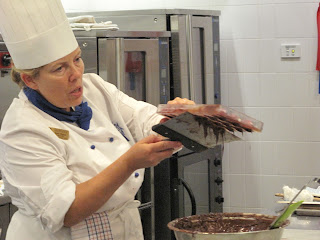
Chef Karen's Toys: Magnetic Chocolate Moulds & Pattern Transfer Sheets
Painting On Food Color For Decoration


Filling Moulds With Chocolate, Tipping Excess Out To Create Chocolate Shells

Scrapping Off More Excess For Clean Finish
Piping Honey Ganache Into Shells

Warming Ganache For Better Adherence (To Chocolate & Transfer Sheet)
Scrapping ON Transfer Sheet

Moulded chocolates done and dusted, we moved on to much easier tasks, namely:

Caramelised Fruits
 
Literally fruits dipped in hot caramel, of which I'm not a fan. The way I see it, a perfectly fresh and sweet piece of fruit should be enjoyed on its own, not encased in a coat of caramel that cuts like glass when you bite into it trying to reach the fruit within. 

Enrobing Preserved Orange Peels In Chocolate: Delightful

Milk Chocolate Fudge

Unlike the white chocolate fudge made in Intermediate which was tongue numbingly sweet, this was slightly more enjoyable, due to the addition of chocolate, what else. Bring to boil sugar, glucose and cream, add to that chocolate and butter, mix to combine and pour into mould to set. Finish with a thin later of tampered chocolate and you're in business!

Slicing Fudge With Guitar Cutter, Enrobing In Chocolate

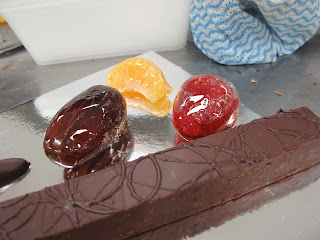
Chocolate And Caramelized Fruit Platter

3 Dimensional Beauty

Surprise Sugar Treats

Morning treat from classmate Matin, I picked a green one. (Pistachio! Yum!)

My Candy Stash: Milk Chocolate Fudge, Caramelised Fruits
Moulded Chocolates, Preserved Fruit Peel

I made a couple of surprising discoveries today:

1. The preserved orange peel which I just knew I would hate at the start of this arduous process turned out to be my favorite! The peel was not bitter or as sweet as I feared (turns out the sugar syrup was mostly there to draw out the moisture from the peel), instead it was only mildly bitter with just the right amount of sweetness and bite in taste and texture that went beautifully with the chocolate shell. I absolutely loved it!

2. The hard caramel on the fruits was just as unappetizing as I thought it would be, but when I cracked opened and rinsed off the offending sugar (I'm not one to waste good food) I discovered the fruits had softened from being dipped in lava hot caramel, "cooking" them ever so slightly which brought out their inherent sweetness to a more pronounced level. 

3. I can tamper chocolate! In the last 3 weeks we have been tampering a lot, and I mean a heck lot of chocolate, getting a ton of practice in the process and today, my tampered chocolate was perfect. And I mean puuurr-feeccttoo! The chocolate on the preserved peels set in less than 2 minutes, and hours later when I brought them home, they were still oh-so-shiny with nary a trace of fat or sugar-bloom. Boo-Yah!